Develop SDV applications to interact with your ECUs
In this tutorial, we’ll walk you through a simple yet illustrative example: creating and deploying a simple LED blinking application to an ECU.
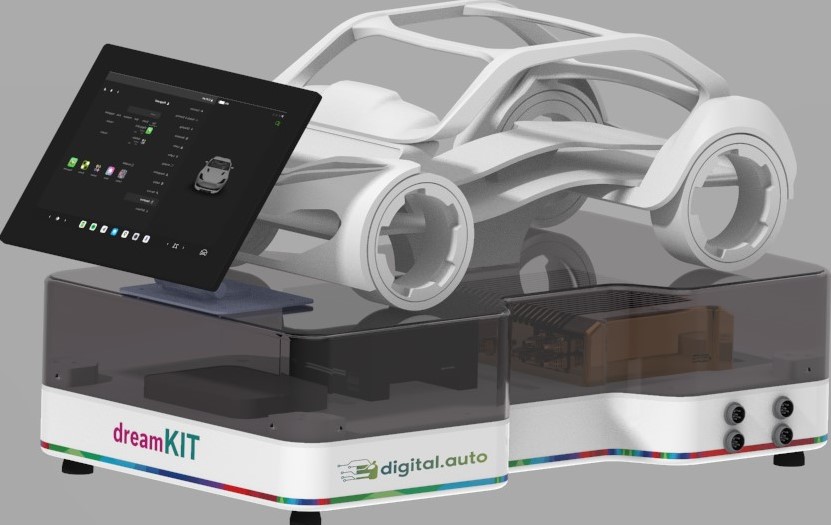
Before going into the coding and deployment, you could explore the digital.auto ecosystem to better understand the capabilities and features of dreamKIT. For a preview of what our team has done with the dreamKIT, please watch our videos. These resources provide you with insights and inspiration for your projects.
Prerequisites
To better follow the guide, you should:
- Have successfully connected your ECUs to the dreamKIT via the CAN ports. The tutorial for making connections with ECUs is here.
- Have a playground.digital.auto account (refer to the link here to sign up) and familiarize yourself with the playground platform.
- Look through the tutorial Create ‘Hello World’ Prototype to understand more about how to create a prototype on our playground platform.
Note: If you have any problem doing this tutorial, please don’t hesitate to contact us for assistance.
What You Will Achieve
By the end of this guide, you will understand how to develop and deploy an SDV application to your ECU. You will soon be able to create more SDV applications and showcase them with your ECU.
Let’s get started and turn your ideas into reality with the dreamKIT!
1. Mapping VSS to DBC signals
In this section, we are going to utilize the digital.auto playground platform to help us deploy the VSS to DBC signals mapping. Our SDV application written on the digital.auto playground interacts with the Vehicle Signal Specification (VSS), while our automotive ECU operates with the database CAN (DBC) signals. The mapping action allows the ECU to understand, and be able to perform your application.
1.1. A quick look to the VSS signals
As can be noticed on the list view, there are actuator and sensor signal types:
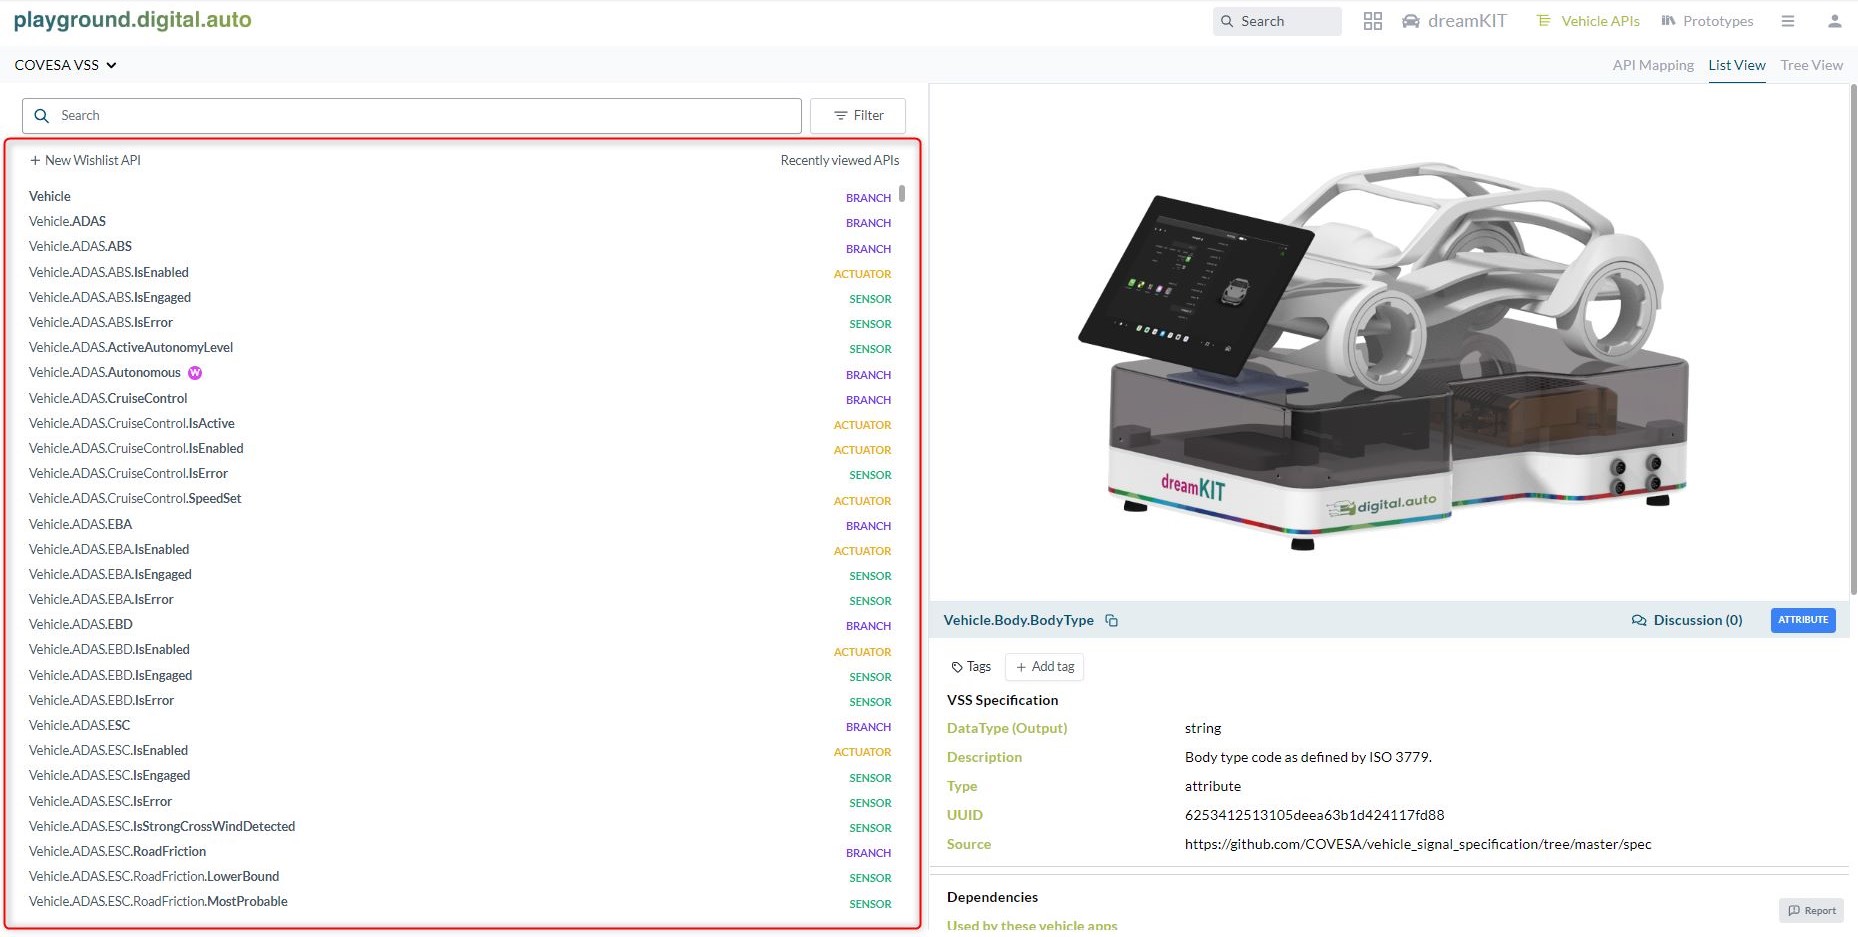
- Sensor type: these are signals to get values of properties in a vehicle.
- Actuator type: are signals used to set the value of a property.
Paying attention to the VSS and DBC mapping direction is essential during application development. VSS2DBC is the actuating (set) direction, while DBC2VSS is the sensing (get) direction.
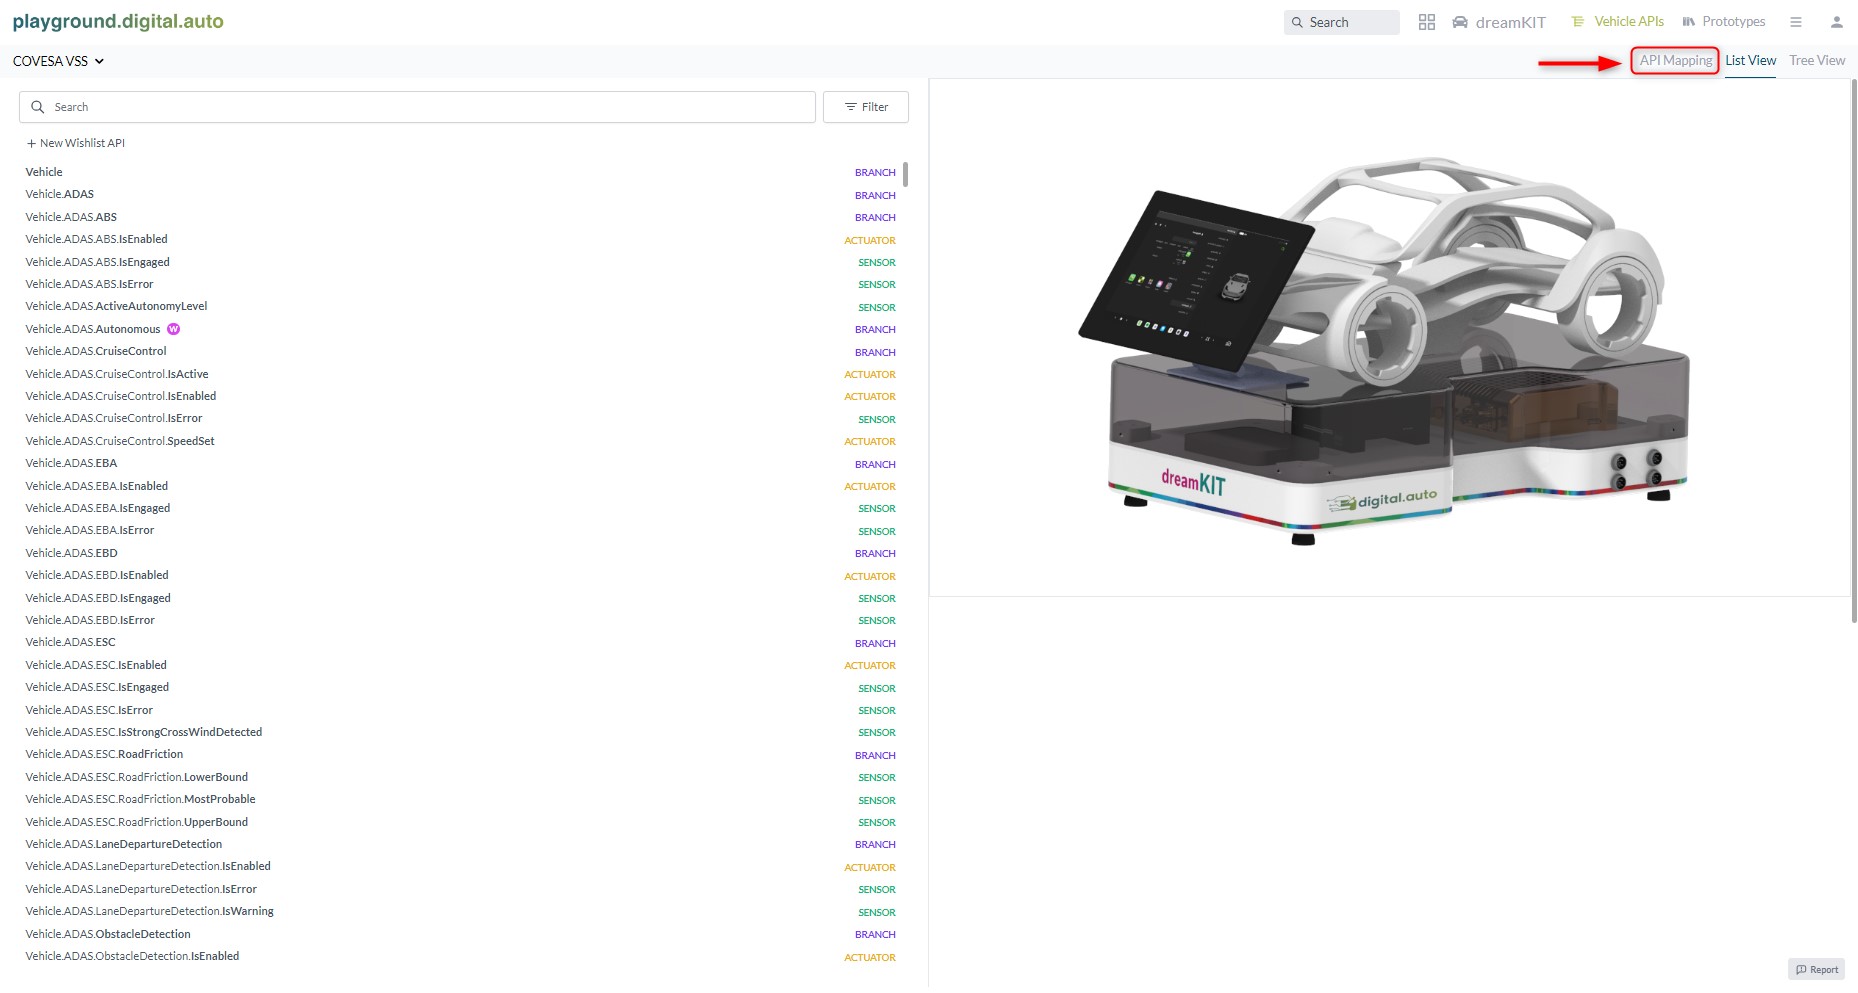
1.2. Access the APIs mapping function
For the API Mapping functionality to be available, please request us for the permission. After the edit permission of this function is granted, you can now choose to open the API Mapping tab:
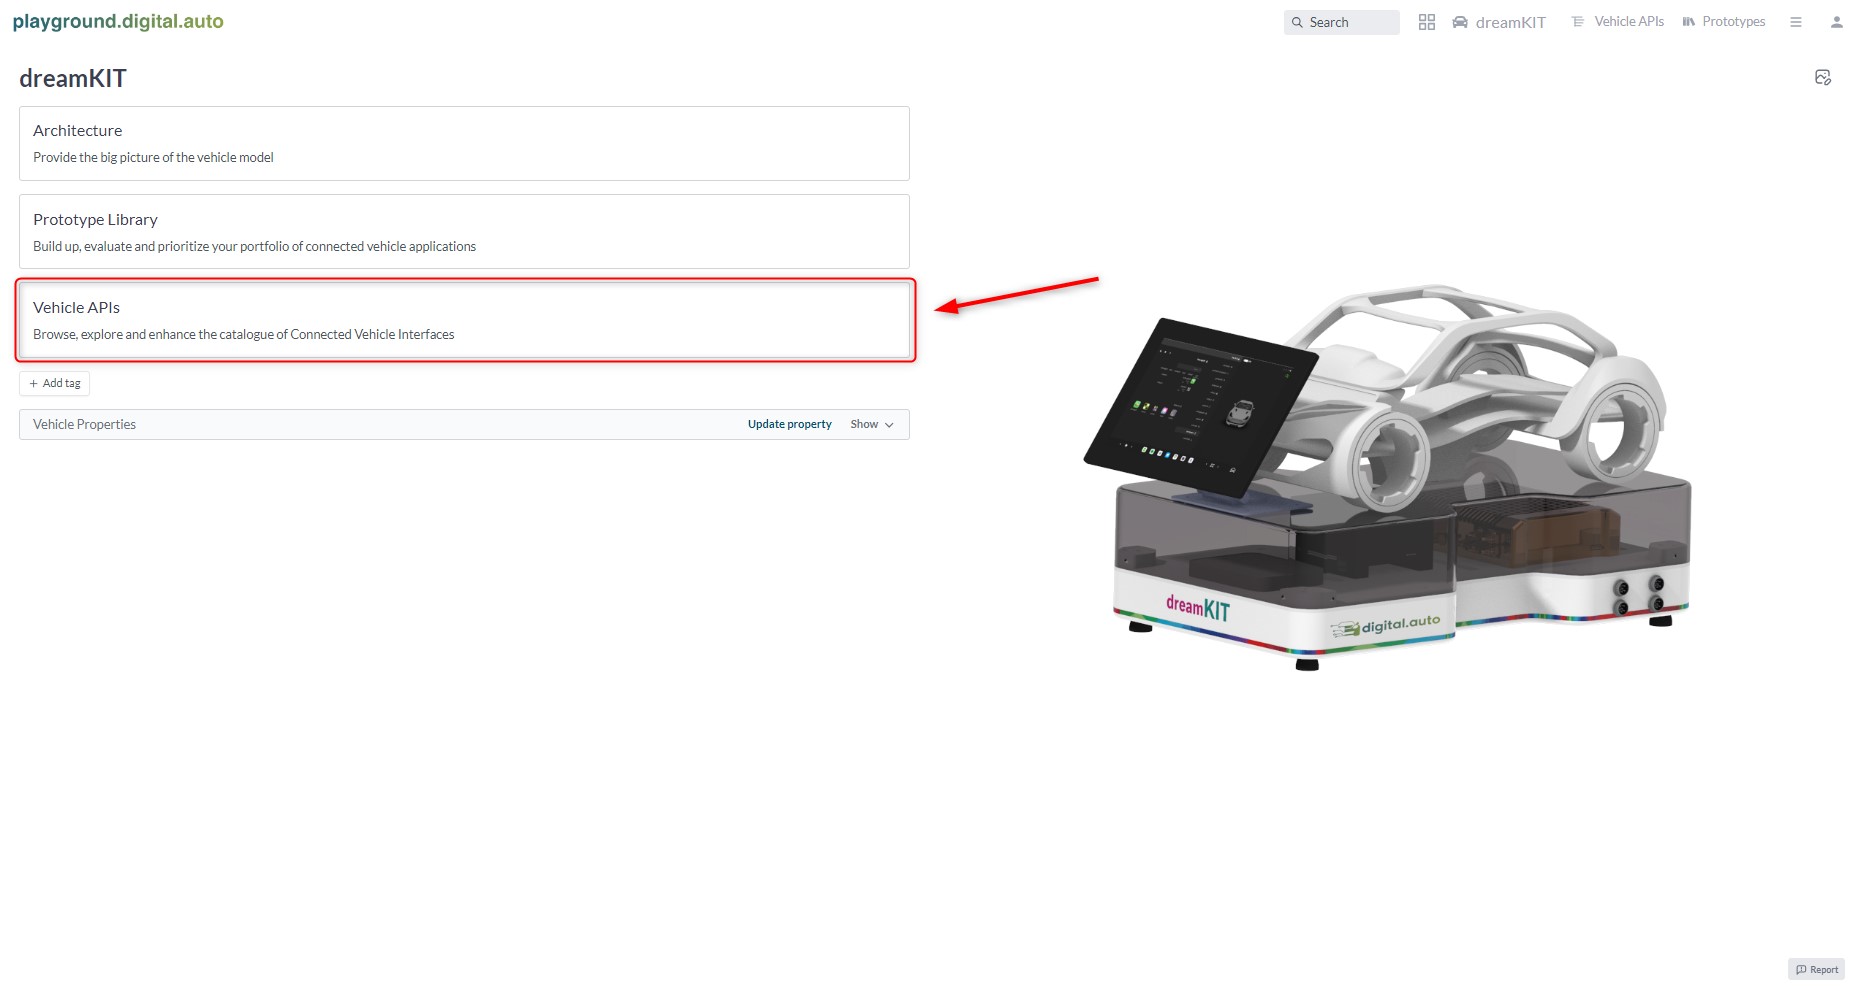
On digital.auto playground platform please access the APIs mapping function by following the steps:
- After choosing the dreamKIT model, please click on Vehicle APIs:
- Click on the API Mapping functionality:
This API Mapping tab will allow you to:
- Create vehicle signal mapping.
- Deploying that mapping to dreamKIT.
- Export and Import mapping configurations.
1.3. Create your signal mapping
Up to this stage, ECU running on CAN cannot understand what to do with the VSS signals sent via the prototype by the playground platform. Your ECU can only understand DBC signals on CAN protocol, so a mapping action is required, to translate the VSS signal to the DBC signal that your ECU can work with.
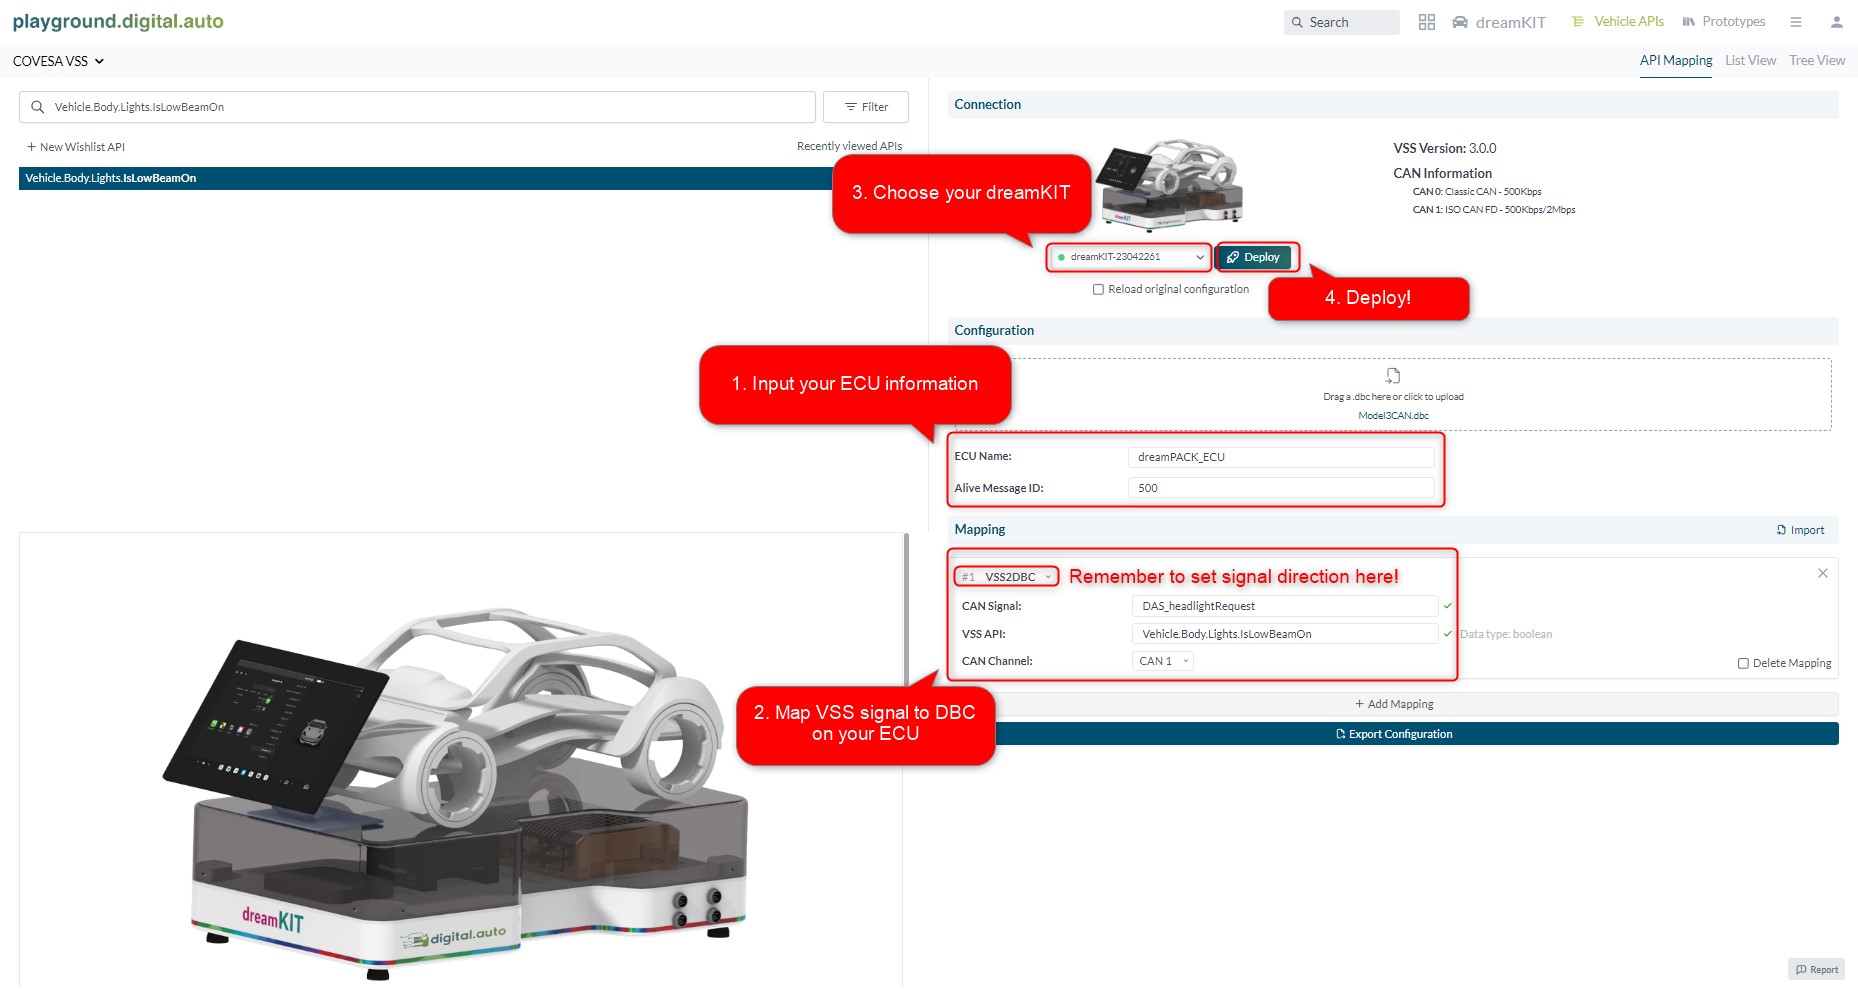
For example, to control the light on an ECU with the VSS API Vehicle.Body.Lights.IsLowBeamOn, the process is described as the following steps:
- Input your ECU information, including ECU Name and the corresponding Alive Message ID (this CAN message ID is unique to your ECU and should be sent periodically from your ECU at the rate of <= 500ms).
- Then map the VSS API Vehicle.Body.Lights.IsLowBeamOn with the DBC CAN signal DAS_headlightRequest on your ECU. The direction must be set to VSS2DBC to indicate that we are Actuating the light on the ECU. In case a Sensor signal is needed, DBC2VSS direction must be chosen.
- Then follow up by selecting your dreamKIT ID in the list.
- Deploy the mapping!
A notification will appear if you have successfully deployed the signal mapping to the ECU:

Now the target ECU can understand applications written using the configured VSS signals. The Vehicle.Body.Lights.IsLowBeamOn VSS API is also what we used in the next step of creating the LED Blinking prototype.
2. Virtual prototyping on the digital.auto playground platform
2.1. The LED Blinking application
Now we are going to create the LED Blinking prototype on digital.auto playground platform. Please access the platform, and then go through this tutorial and follow from “1. Login”, find and pick dreamKIT model in “2. Create a Vehicle Model”, and follow along to “4. Write simple headlight-blinking code”.
The result after following suggested tutorial is expected to be like this:
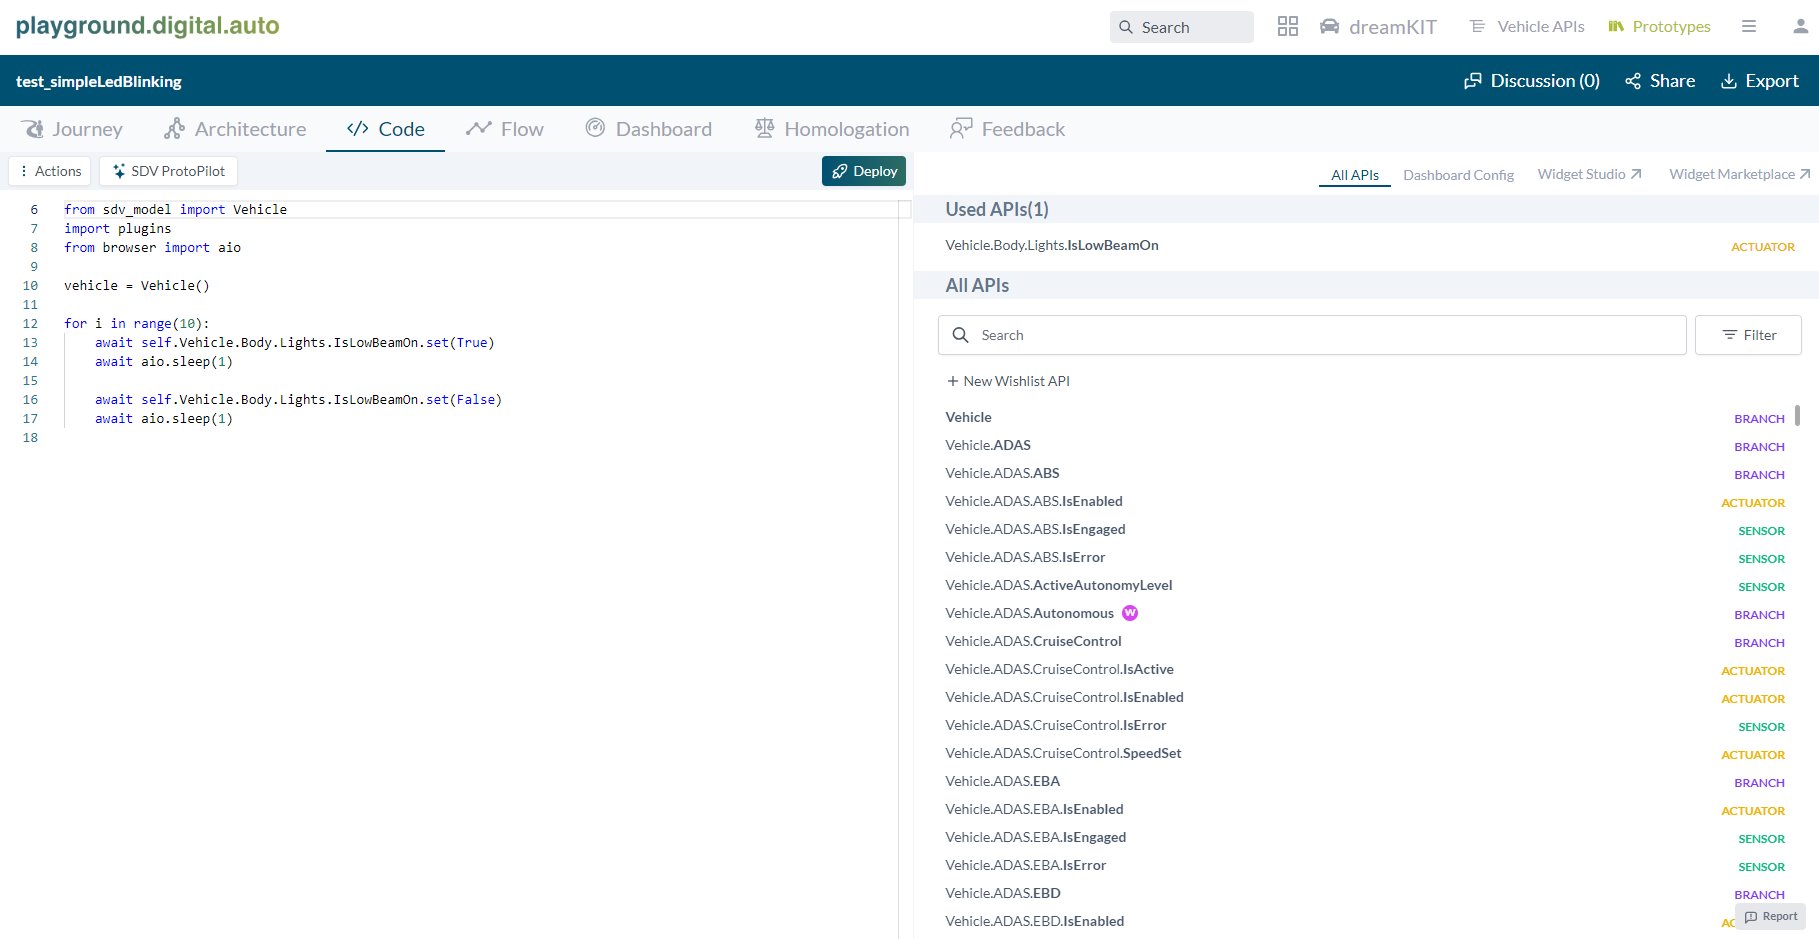
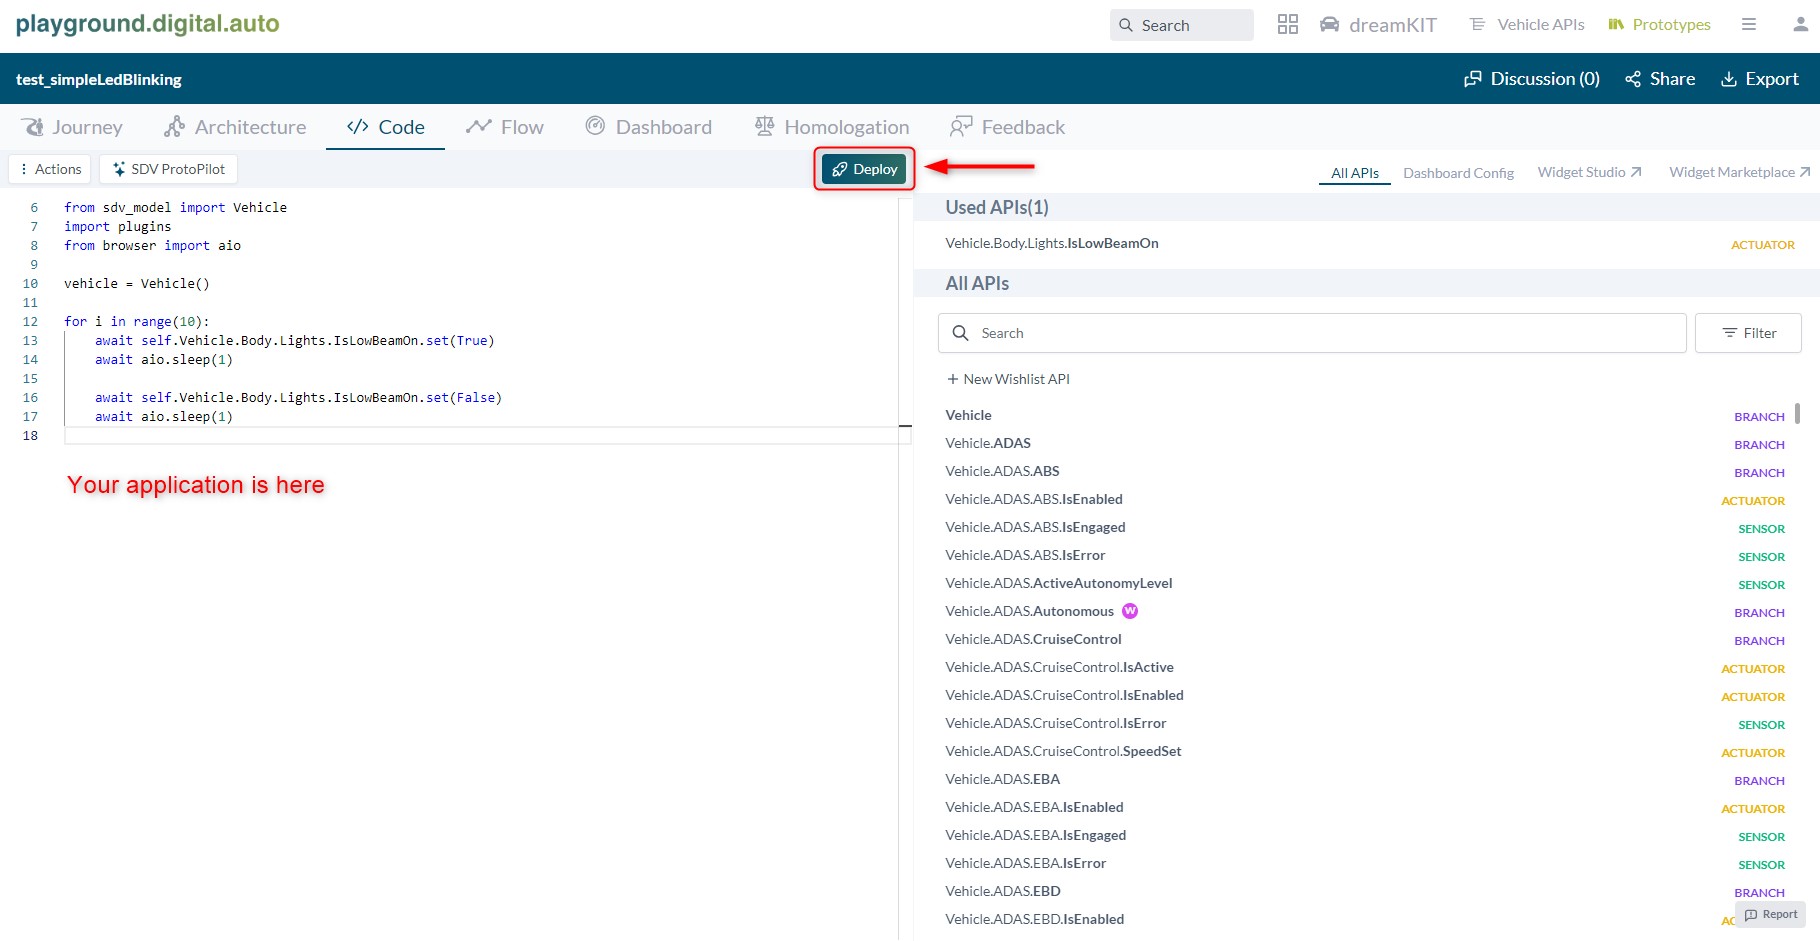
The simple LED blinking code should look like this:
from sdv_model import Vehicle
import plugins
from browser import aio

vehicle = Vehicle()

for i in range(10):
    # code to turn headlight on
    await self.Vehicle.Body.Lights.IsLowBeamOn.set(True)
    await aio.sleep(1)

    # code to turn headlight off
    await self.Vehicle.Body.Lights.IsLowBeamOn.set(False)
    await aio.sleep(1)
2.2. Deploy the prototype to dreamKIT
The Deploy functionality will send the prototype to the dreamKIT via a network connection, so it is required to add a Wifi connection to dreamKIT to allow this over-the-air (OTA) deploying function to operate.
- First, make sure that dreamKIT is connected to Wifi. If the dreamKIT has not been connected to any wireless network yet, then please read the following instructions to connect one:
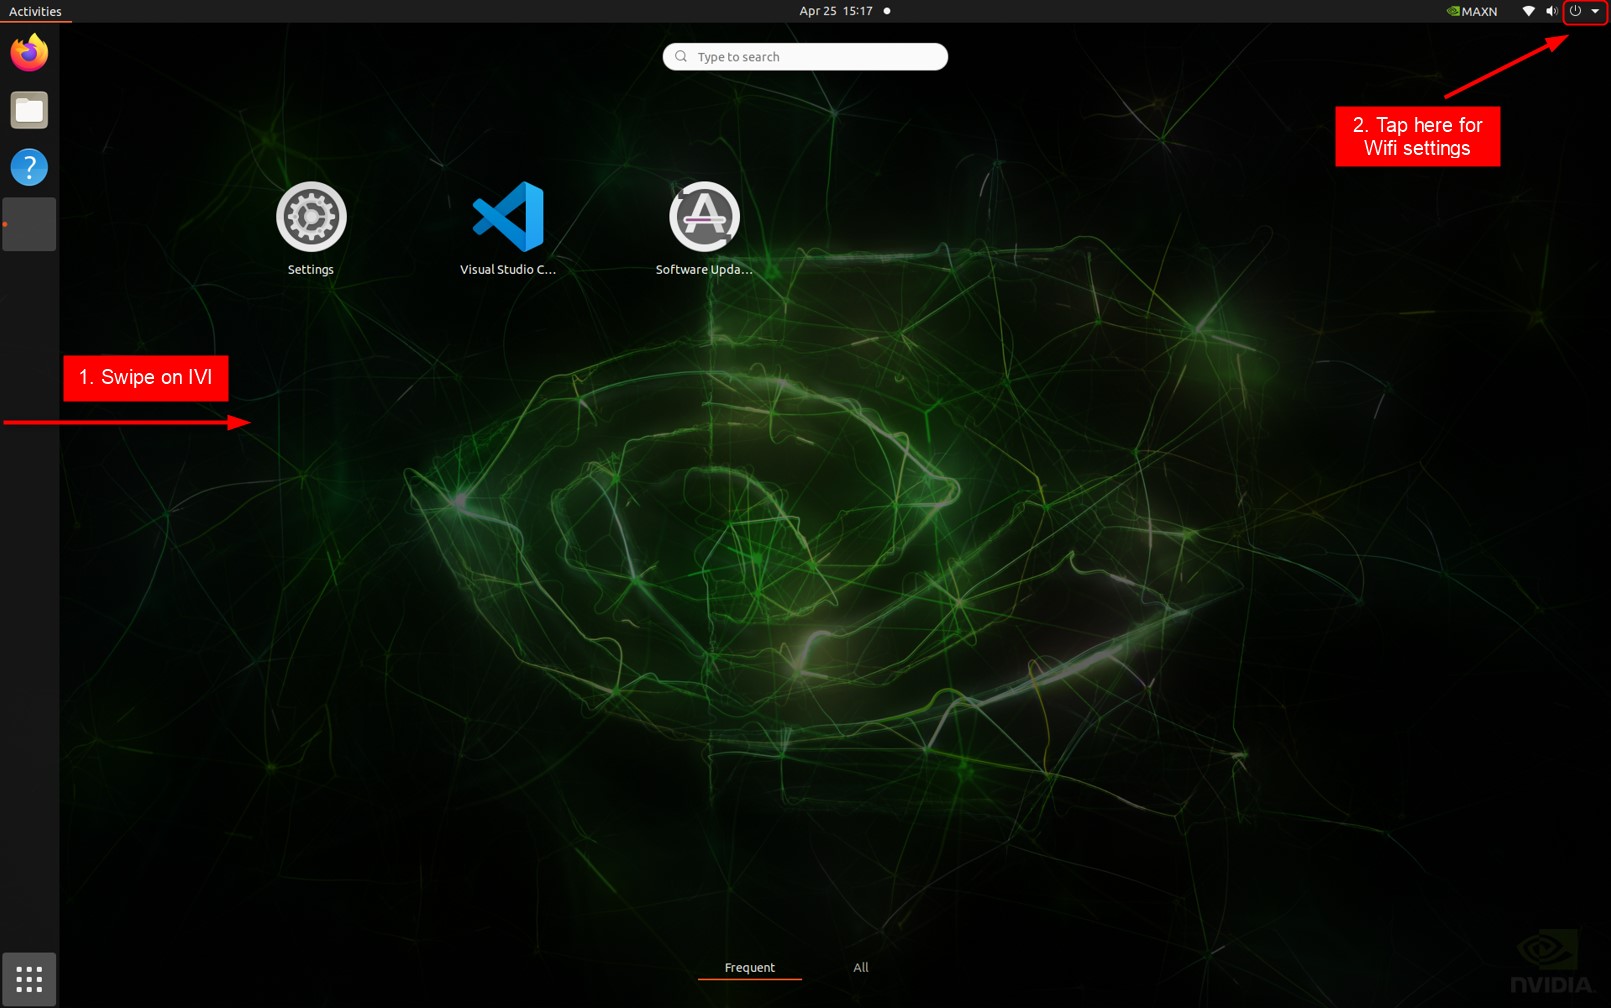
- The IVI is a touchscreen display. From the startup screen on the IVI, please swipe from the outer left side of the screen to the right to get out of the dreamKIT software window. Then access the settings button on the top right corner and tap it:
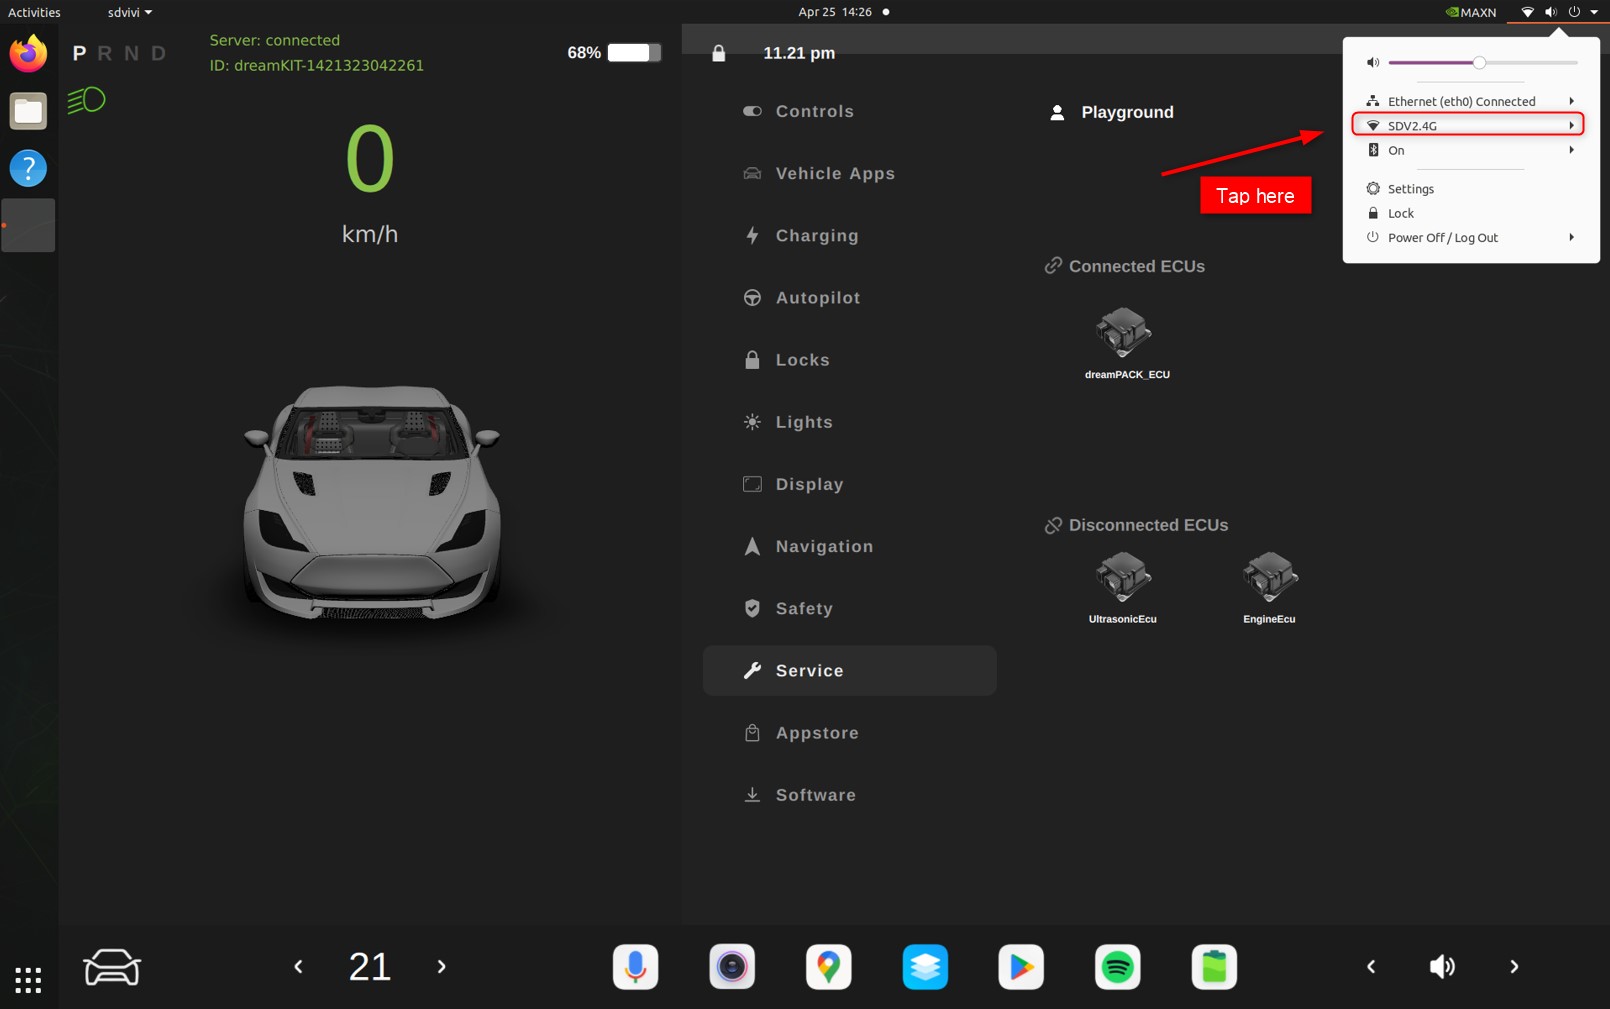
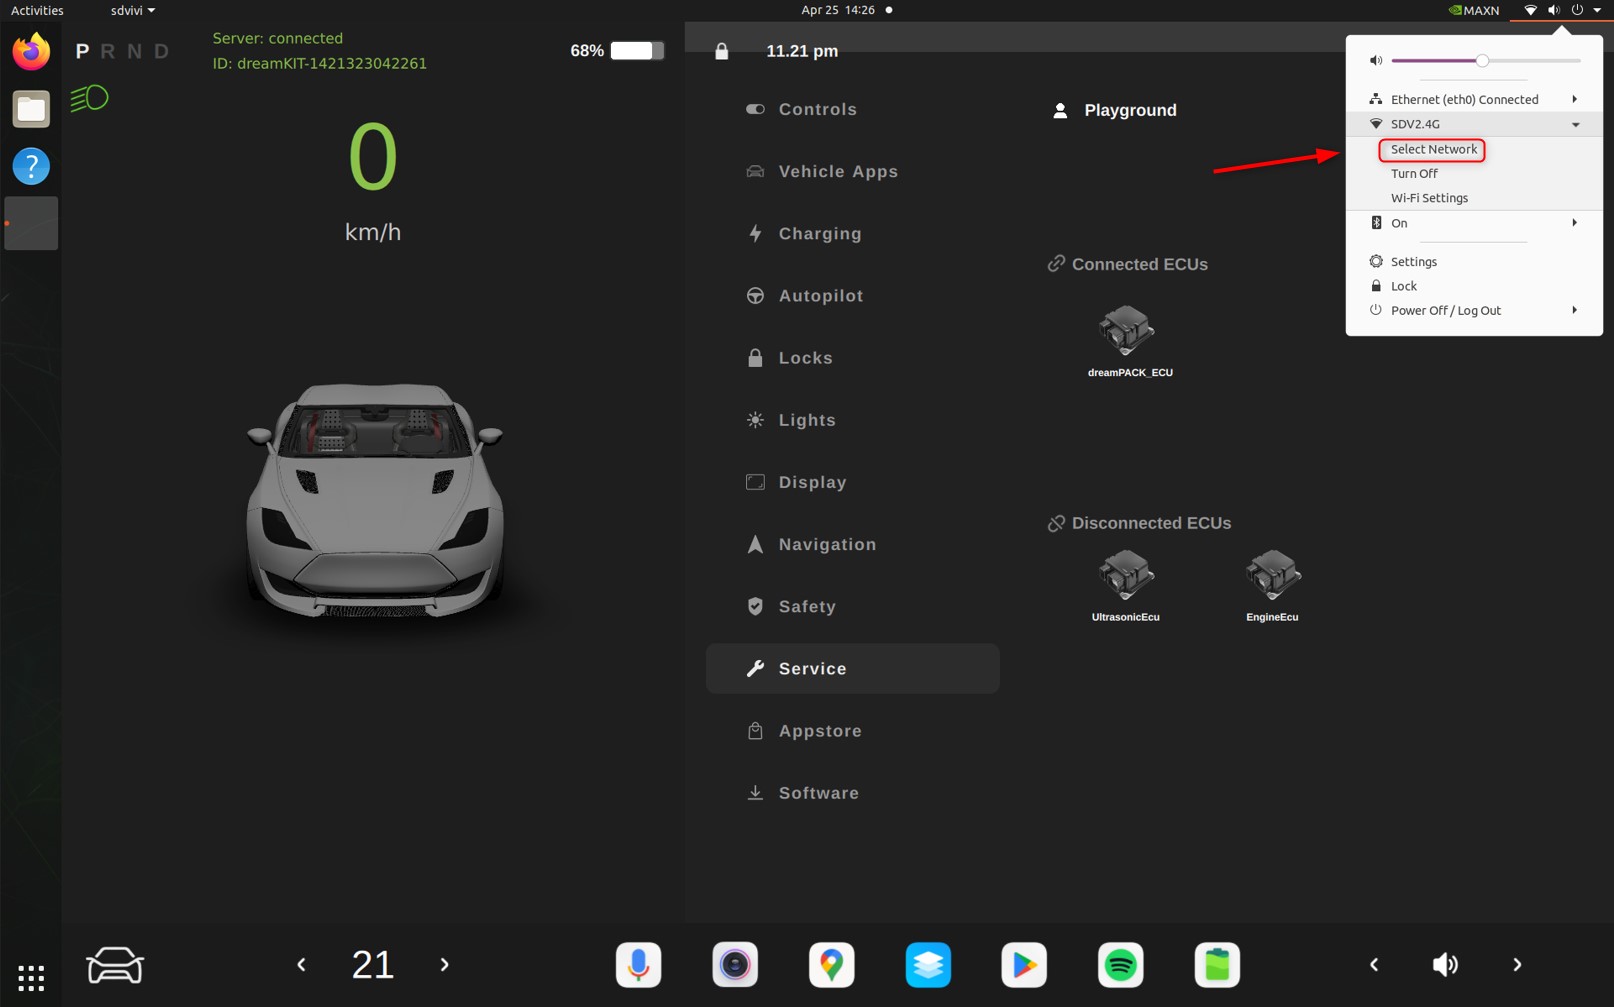
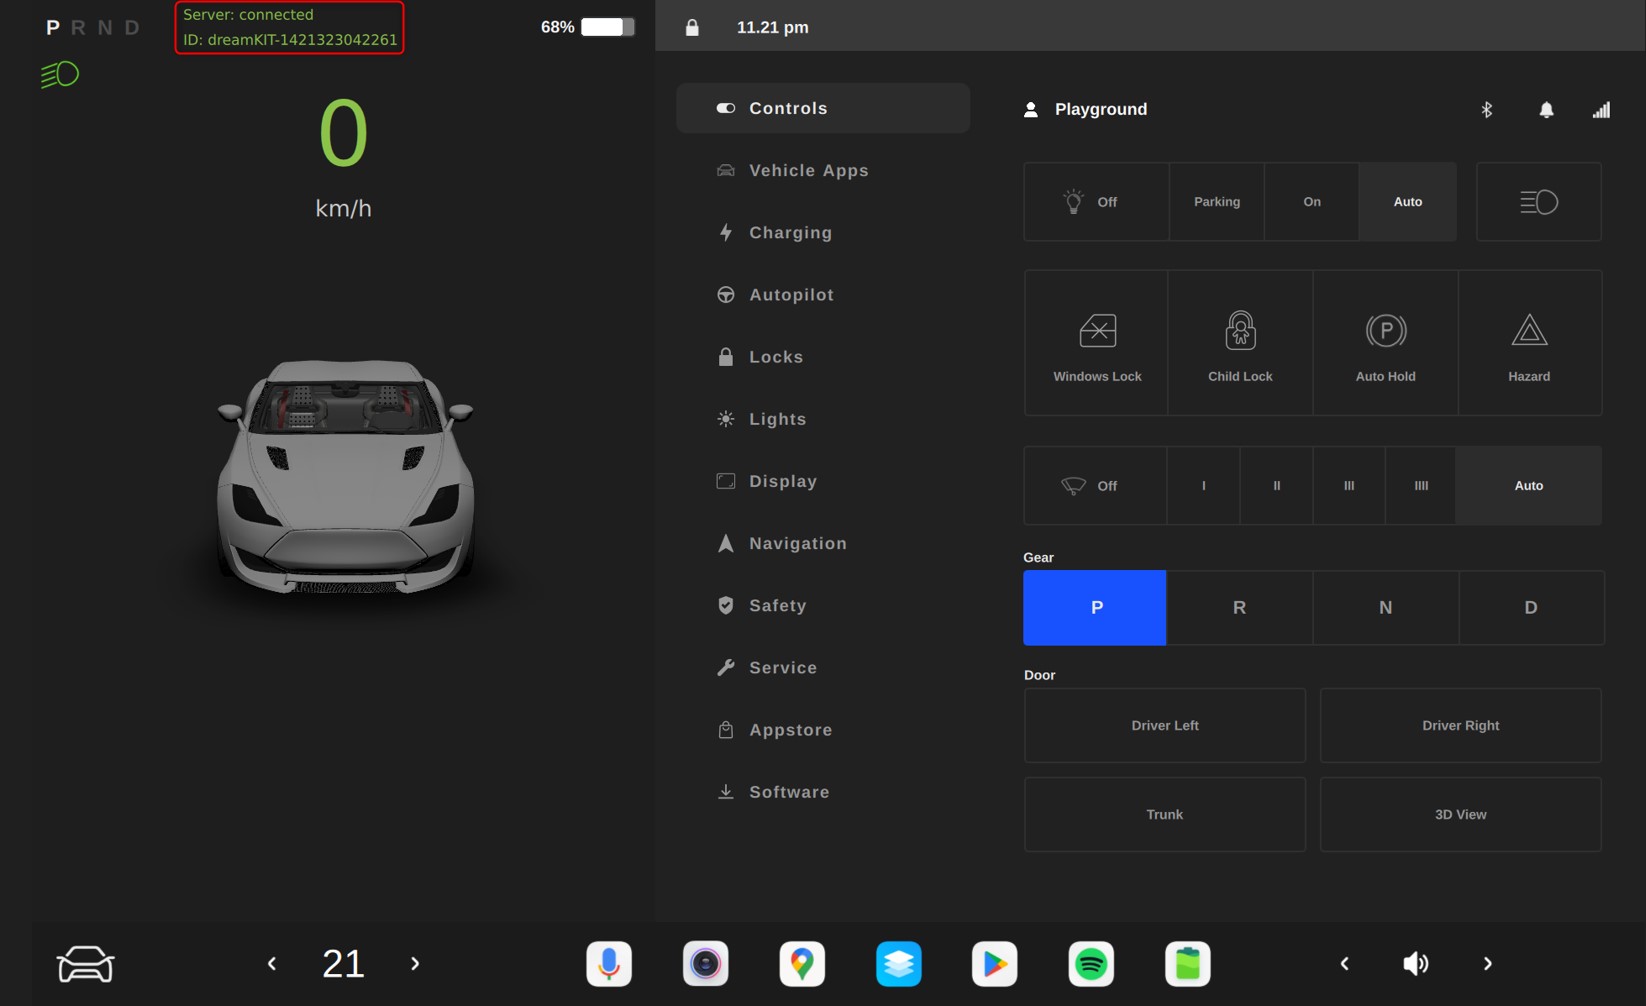
- The online status of our dreamKIT is now displaying “Server: connected”. Please pay close attention to the “ID:” information section, too. The last 8 digits of dreamKIT’s ID will be used to recognize your dreamKIT when deploying apps on digital.auto playground!
- Now let’s deploy SDV application.
- Go to your created prototype on Playground:
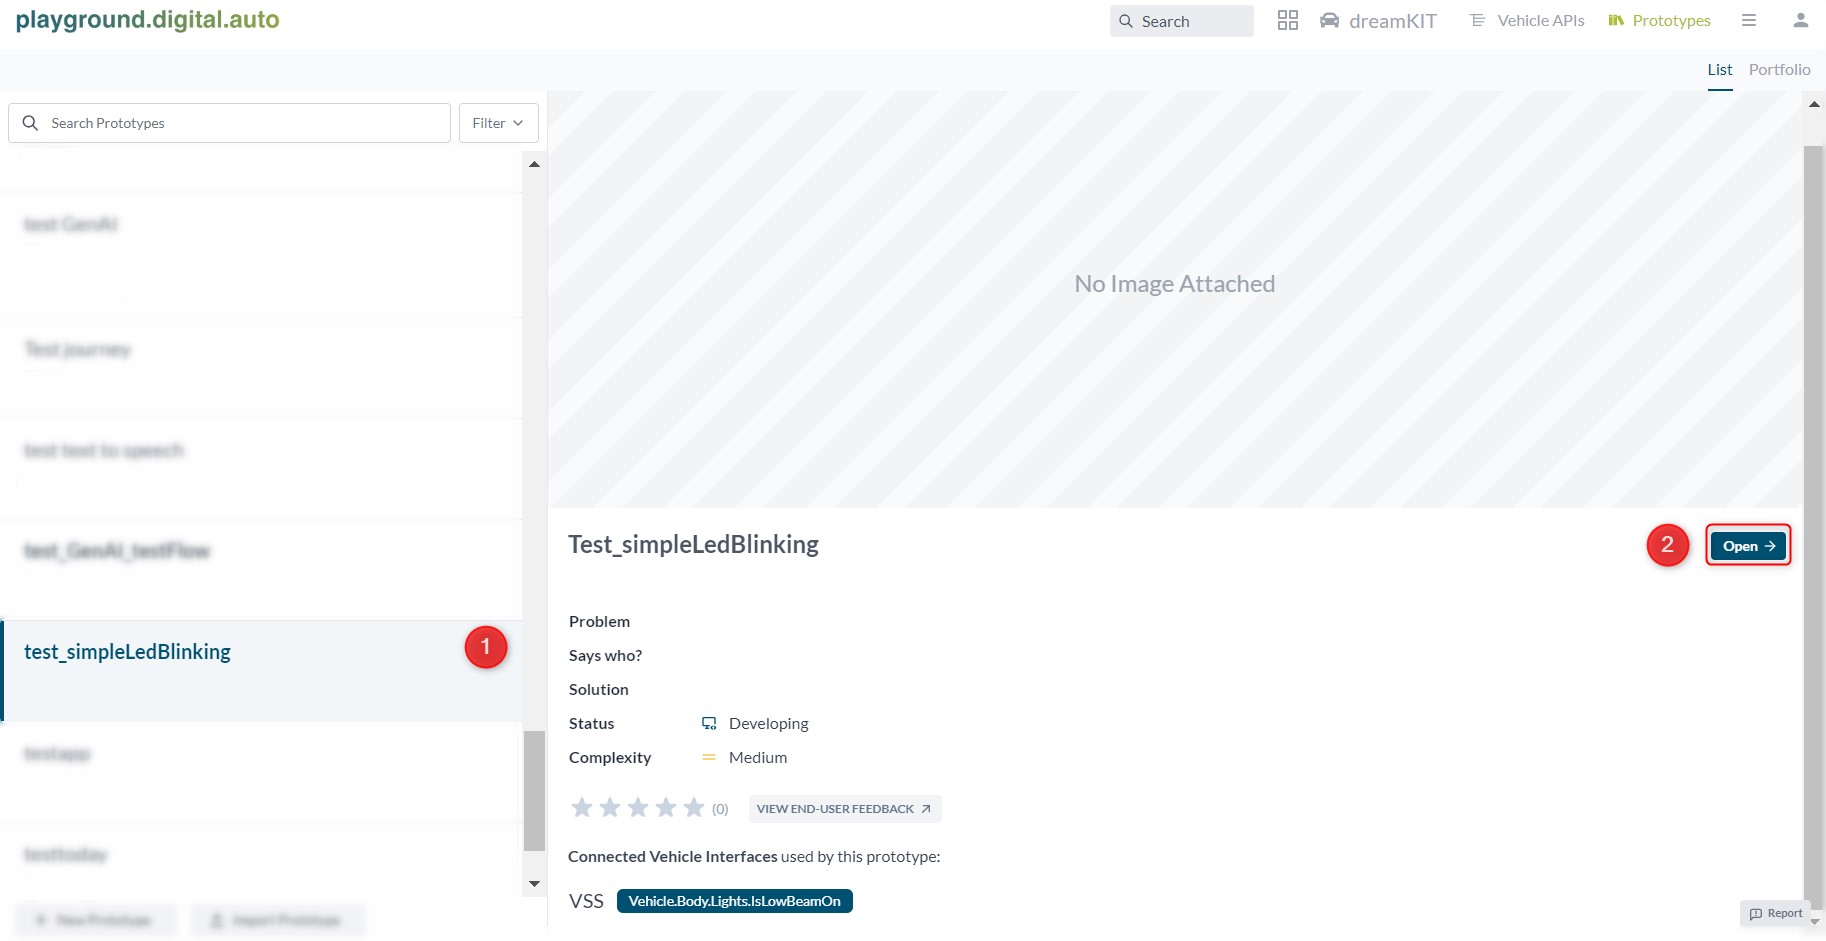
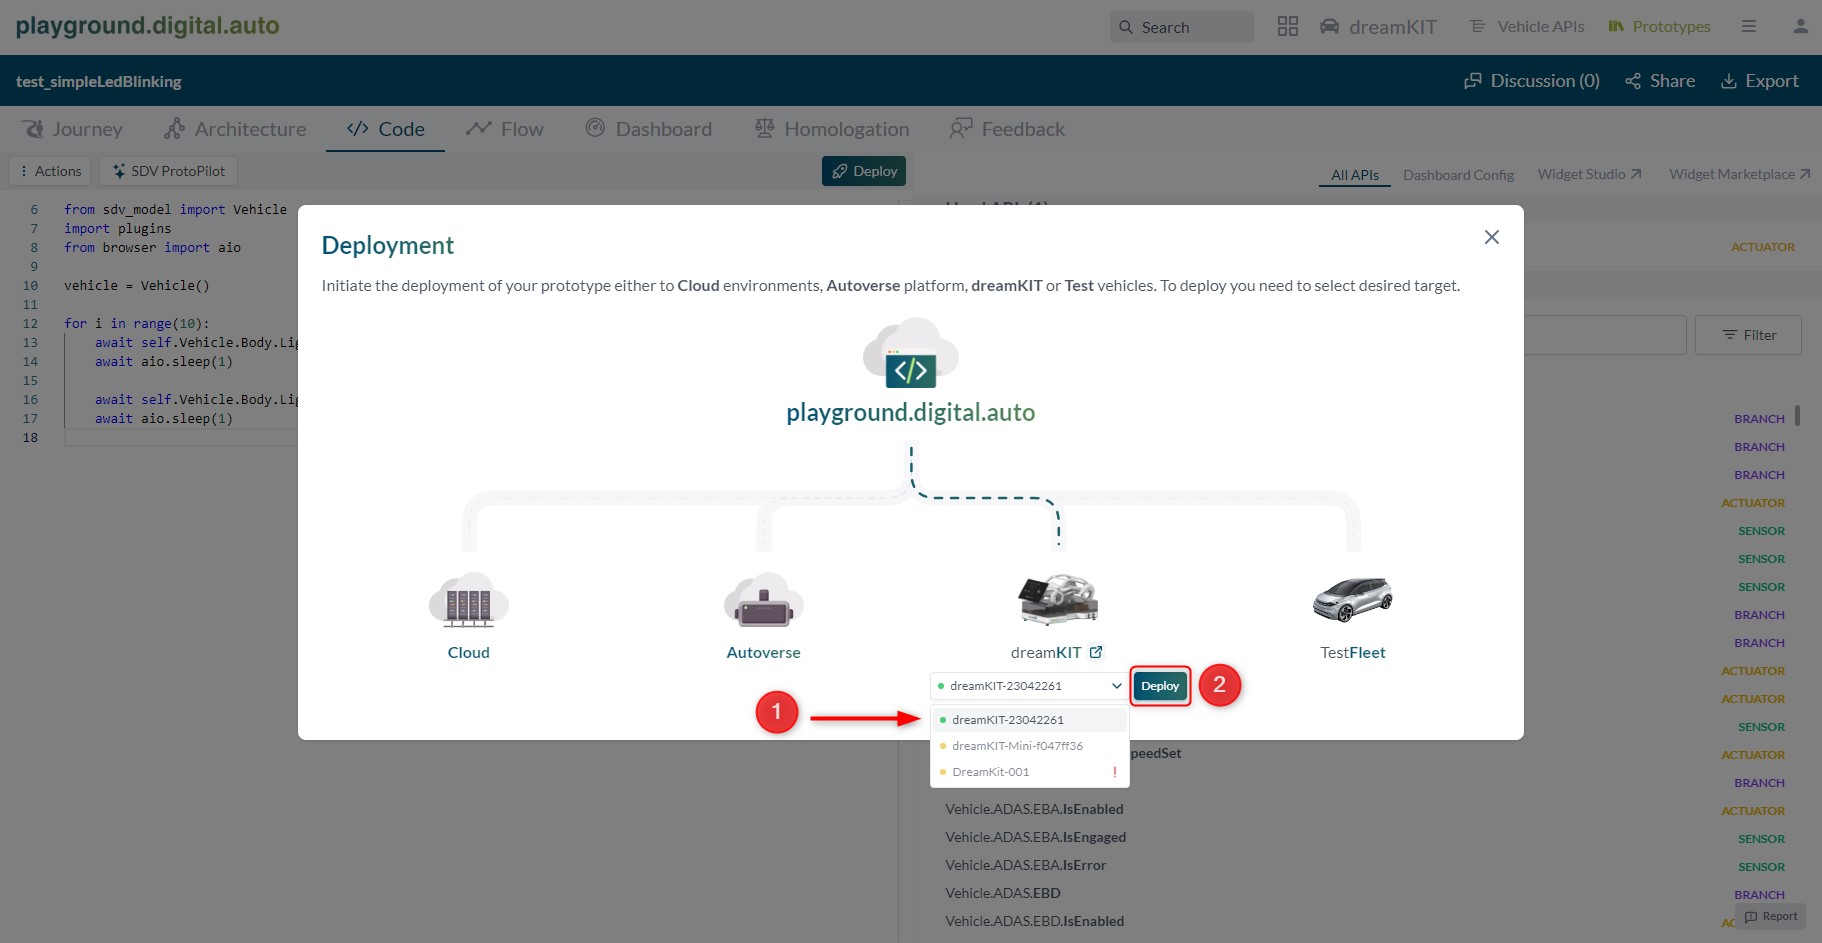
- Under the Code tab, click the Deploy button:
- If your dreamKIT is online, under the Deployment window can you find your dreamKIT model online status. Please choose your dreamKIT and finally click Deploy:
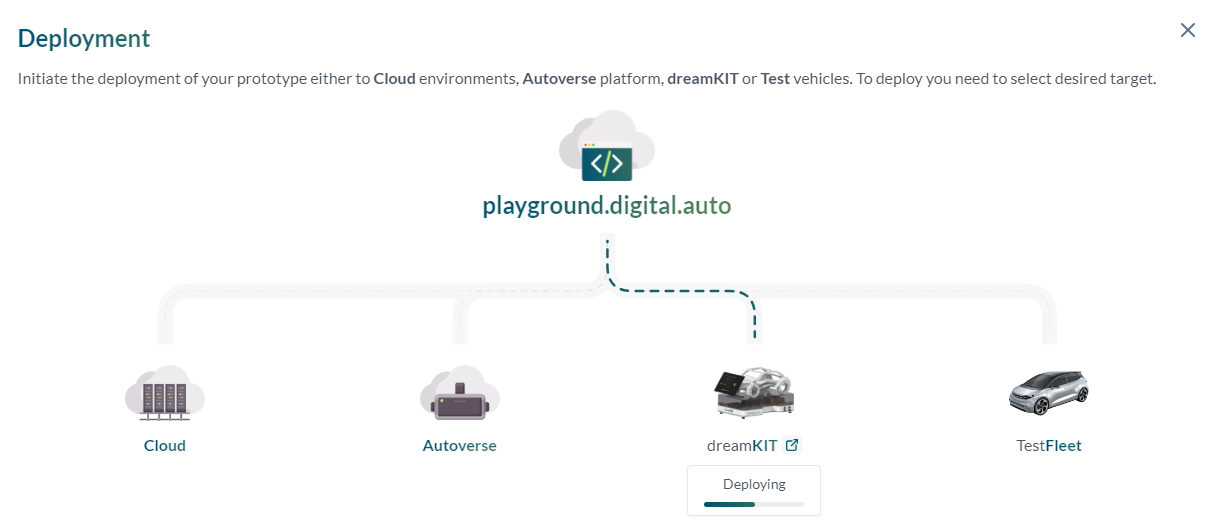
- Deploying…
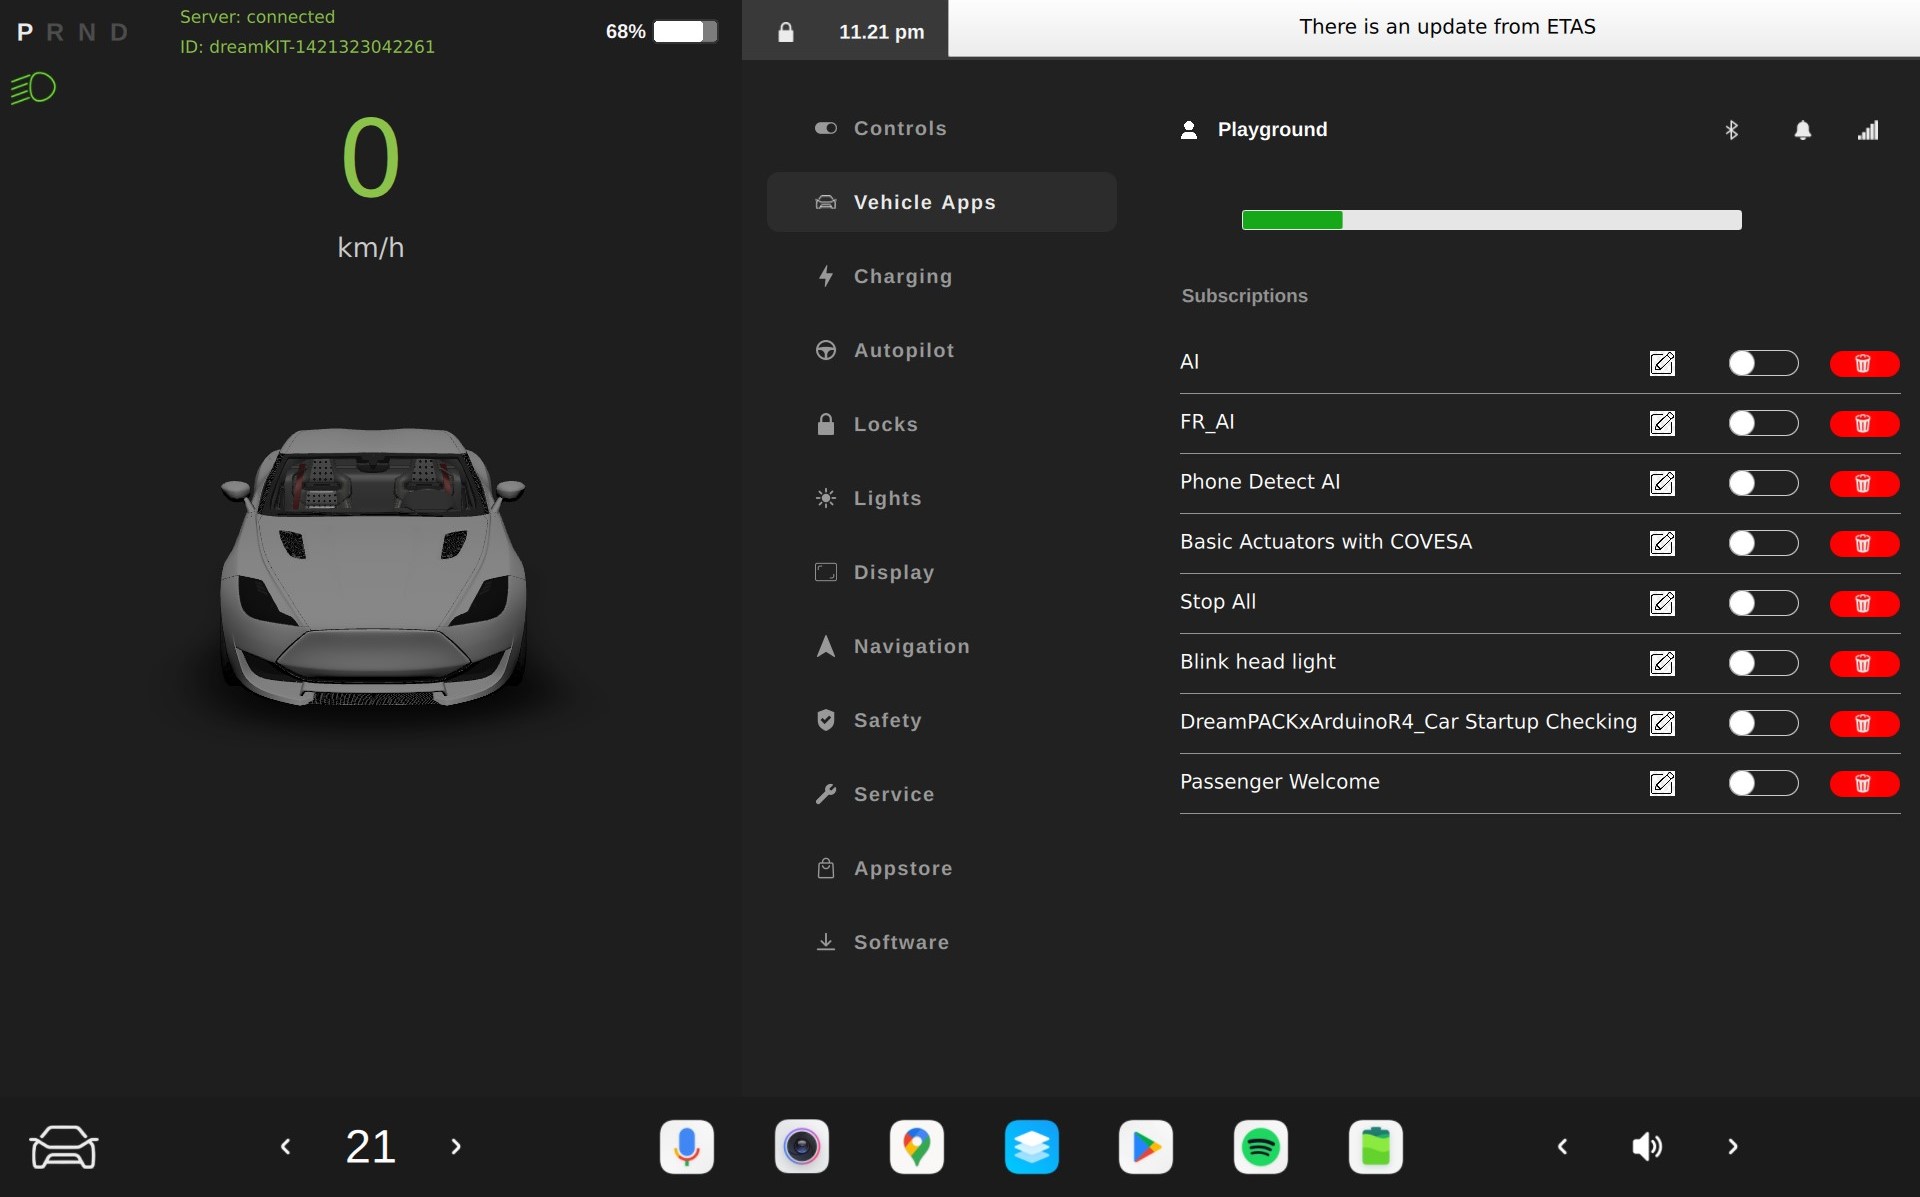
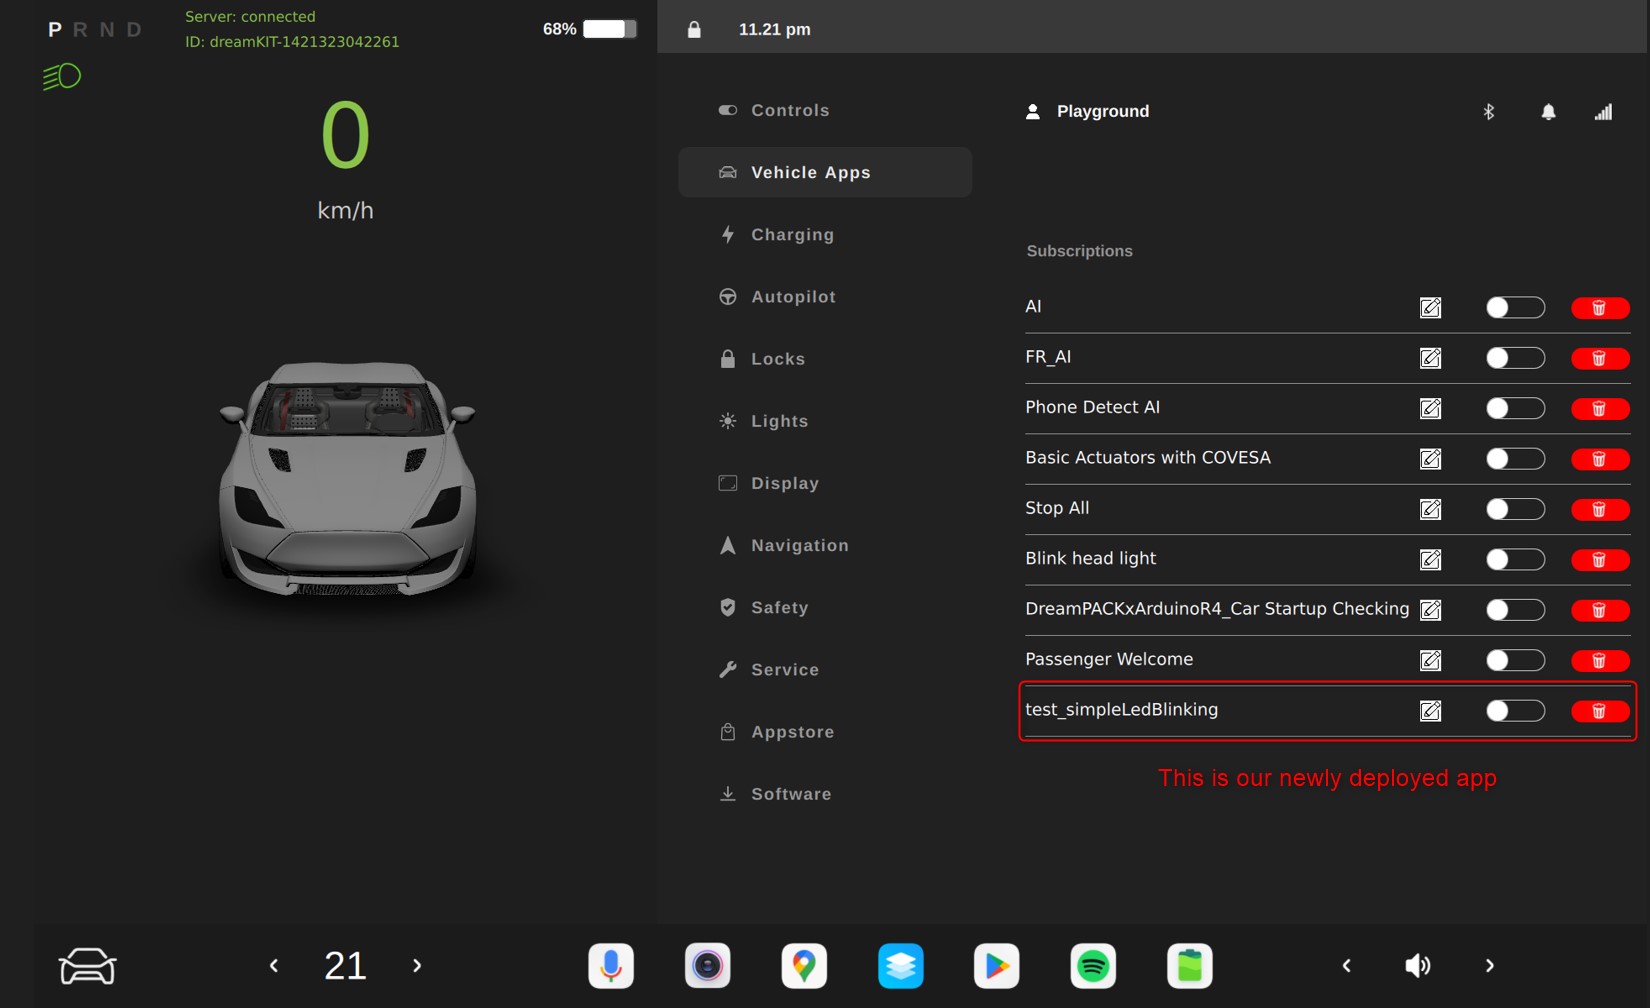
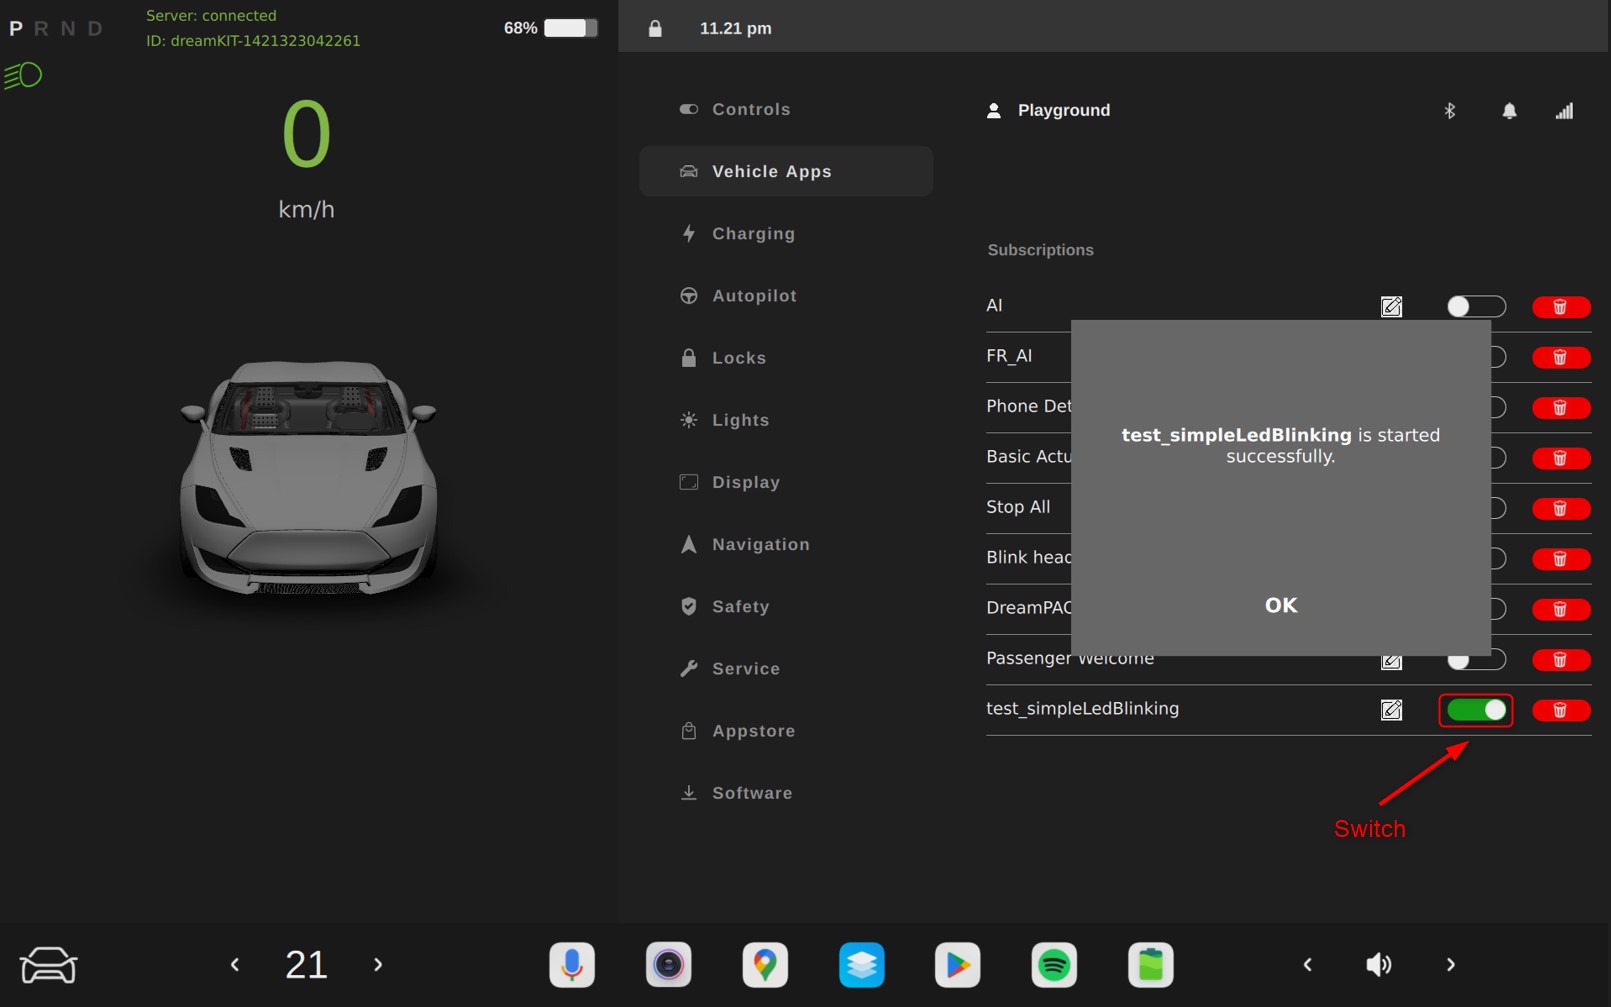
- A notification “There is an update from ETAS” will appear on the IVI, and your prototype will also appear in the Vehicle Apps list. The picture below shows my app that has been successfully deployed:
- You can now test your Vehicle App by simply sliding the button on your application on the IVI. A notification will pop up to tell you that your app has been toggled successfully:
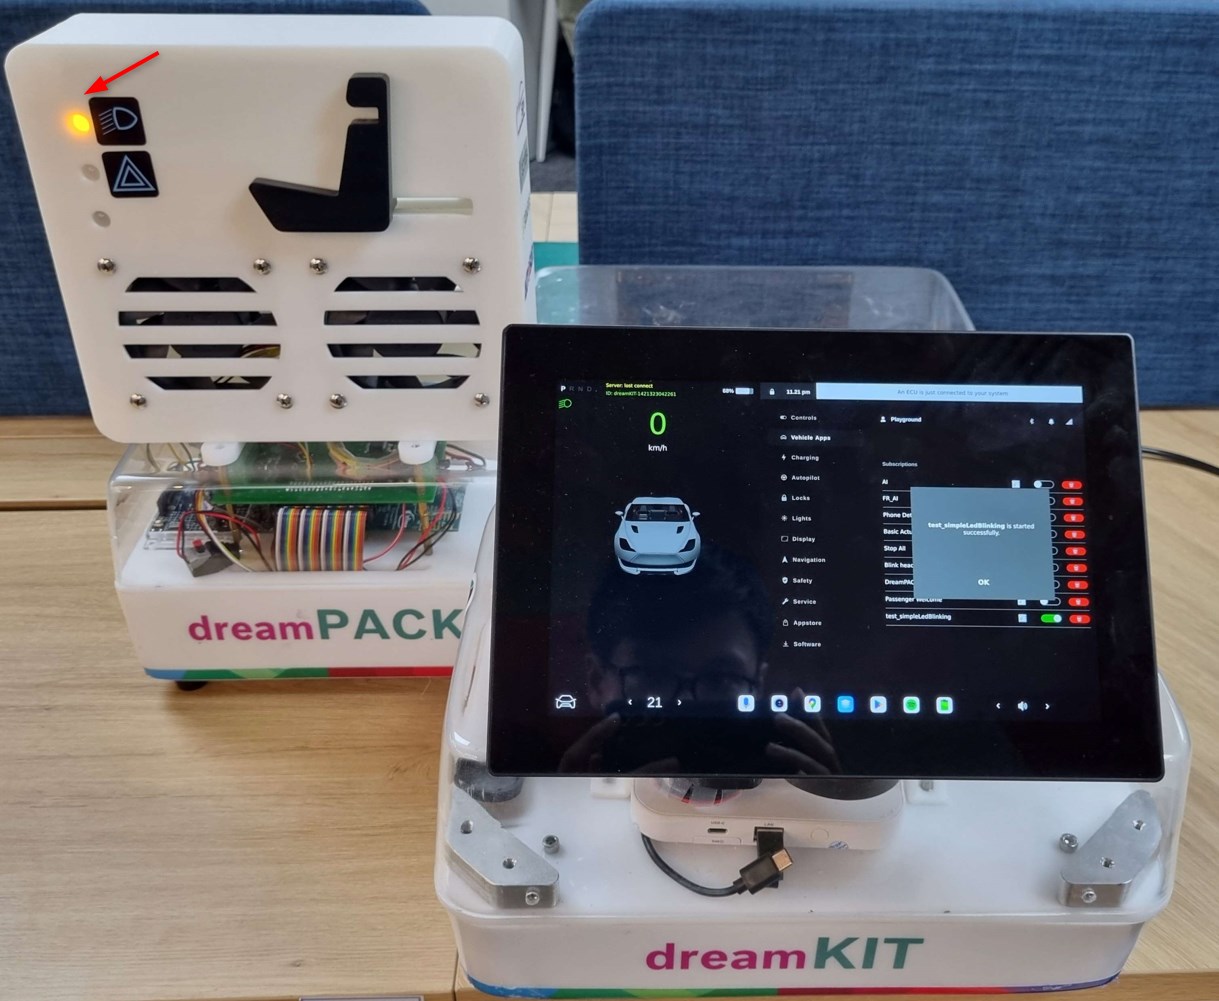
Watch how the changes you have made act on your ECU. On our dreamPACK_ECU, the LED is now blinking!
3. Create your SDV application directly on the dreamKIT
Another way to develop applications for your ECU is by creating Python scripts on the dreamKIT. The Python template for SDV application development is provided by Velocitas. From this template, developers can further develop their applications based on those pre-defined templates for higher efficiency. The Python template can be accessed here.
Our LED blinking example, when written in the form of a Python code, will look like this:
import asyncio
import json
import logging
from logging.handlers import RotatingFileHandler
import signal

from sdv.util.log import (
    get_opentelemetry_log_factory,
    get_opentelemetry_log_format,
)
from sdv.vdb.reply import DataPointReply
from sdv.vehicle_app import VehicleApp
from vehicle import Vehicle, vehicle

# Configure the VehicleApp logger with the necessary log config and level.
logging.setLogRecordFactory(get_opentelemetry_log_factory())
logging.basicConfig(filename='app.log', filemode='a',format="[%(asctime)s] %(message)s")
logging.getLogger().setLevel("INFO")
logger = logging.getLogger(__name__)
handler = RotatingFileHandler('app.log', maxBytes=1048576, backupCount=1)
logger.addHandler(handler)

class test_simpleLedBlinkingApp(VehicleApp):
    """Velocitas App for test_simpleLedBlinking."""

    def __init__(self, vehicle_client: Vehicle):
        super().__init__()
        self.Vehicle = vehicle_client
        self.home = None
        self.stop = None

    async def on_start(self):
        for i in range(10):
            await self.Vehicle.Body.Lights.IsLowBeamOn.set(True)
            await asyncio.sleep(1)
            await self.Vehicle.Body.Lights.IsLowBeamOn.set(False)
            await asyncio.sleep(1)

async def main():
    logger.info("Starting test_simpleLedBlinkingApp...")
    vehicle_app = test_simpleLedBlinkingApp(vehicle)
    await vehicle_app.run()

LOOP = asyncio.get_event_loop()
LOOP.add_signal_handler(signal.SIGTERM, LOOP.stop)
LOOP.run_until_complete(main())
For a quick run please go to your Python script location in the dreamKIT file system, and then run:
$ HOME_PATH=~
$ dapr run --app-id testapp --app-protocol grpc --resources-path $HOME_PATH/.dapr/components --config $HOME_PATH/.dapr/config.yaml --app-port 50008 python3 /your_python_directory/your_file.py$
Watch how the changes you have made act on your ECU. On our dreamPACK_ECU, the LED is now blinking!
Tip: It is more advantageous to write prototypes using the manual method, as it is easier for us to integrate our Python script with third-party components into our system during the application’s development!
Need assistance? Contact our development team
Should you have further interest to dreamKIT, please leave us some more specific query here: https://forms.office.com/e/BiJcMEhbBy
Our team is committed to providing you with the necessary support to address your queries and challenges promptly.
Related Documentations
- To learn more about Vehicle Signal Specification (VSS): please refer to this link.
- To learn more about KUKSA.val, the in-vehicle software components for working with in-vehicle signals COVESA VSS: please refer to this link.
- To learn more on how Velocitas has helped us in faster application prototyping, please refer to the documentations provided here.